
Monday, 22 January 2018
Wednesday, 29 November 2017

Thursday, 4 June 2015
Toy Candy
Toy Candy

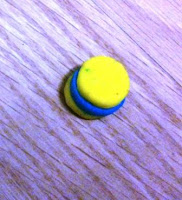
In today’s post I am going to show how to make a clay(polymer) candy without using any tools.


In today’s post I am going to show how to make a clay(polymer) candy without using any tools.
Here I used red, yellow and blue coloured polymers.

First spread the polymers into a thin sheet like structure
and cut them into 3 or 4 small circles in each colour, no need to be a exact circle,
as we are not using any tool.

Now sandwich a blue circle inside two yellow circles, as
shown in fig.
Repeat the above step and make another one.

Join the two sandwiches and roll it in between the palms and
to make it as a long rope.

Now, with that multi-coloured rope make a circle shown in fig.

To make Stick;

Take red colour clay and make a rope by rolling it in
between your palms.Make two ropes and twist it as shown in the figure.

Connect the twisted rope on the back of the candy.
Monday, 11 May 2015
My Son’s First Painting

This cute little hand is belongs to my
handsome son who is 13 month year old. We
were having fun with drawings and paints. After some time, I tried colouring his
palm with paint for fun and tried taking the impression of his pretty little
hand on a paper.
He saw his painted hand on the paper and
was surprised. He then tried the same using with some other colour. He enjoyed
doing it again and again with different colours making the coloured water spill over and
messing the floor. He was having a lot of fun.
I silently picked one finger painted paper and preserved it sticking it
on my room wall.
Time went by and I had to clean the messed
up place. But he was not ready for it. He started to cry whenever I tried
cleaning the place. He wants to play again and again. It seems there was no end
to it.
Our first painting together was such a cute
moment in my life. Not only on the paper but my son has painted my life in
beautiful colours. And he is ready to paint more and I don’t care about the
mess anymore… we are in the process of messing the place the again.
Thursday, 30 April 2015
With Love,Frog
With Love, Frog

In today’s post, I am going to make a simple frog using polymer clay (green,yellow,red and blue).

Body:
You can make one big round ball in whatever colour you like for the body of the frog. Here, I am using green colour.
You can make one big round ball in whatever colour you like for the body of the frog. Here, I am using green colour.


Place small yellow ball above the green ball and press the yellow ball flat on the round shape. Mold one side smaller than the other as shown in the figure


Take another green round ball and smooch onto the work surface to make them flat (as shown in the figure). Using your needle tool, mark the mouth and make a curved line. To make the mouth more gaping, use a razor and cut.
For the Eyes:
Use small green balls to make the eyes. Take another small yellow ball which is smaller than green balls and press it on the green one.


Eyes:
Next, place very small blue or black ball over the eye ball as shown in the figure. Place the eye ball on the flatten green clay.


Legs:
Take 4 even balls of clay.Mold into a teardrop shape and smooch onto the work surface to make them flat.


Cut grooves in the middle of the widest part.Cut two more grooves (one on each side) to make the four “toes”.Lengthen and shape the toes using needle tools and your fingers. Place the head on the top of the body and the legs on the sides.

Finally, make a heart
Take red color and make it round shape
and press as shown in the figure
Cut at the top in v –shape and shape it
Place it on the frog as shown in the figure.


Subscribe to:
Posts (Atom)